Docs
Guide
Everything Prompt Management Studio does, in the order you'll probably use it. No account or install needed. Open the app and it's ready.
Getting started
Open the app. The app has four tabs: Library, Add Prompt, Chat and Models. On first load it adds 1,000 built-in prompts, each with example responses, so there’s something to explore right away. Everything you create is saved in your browser as you go; there’s nothing to sign up for and no save button to forget.
The library
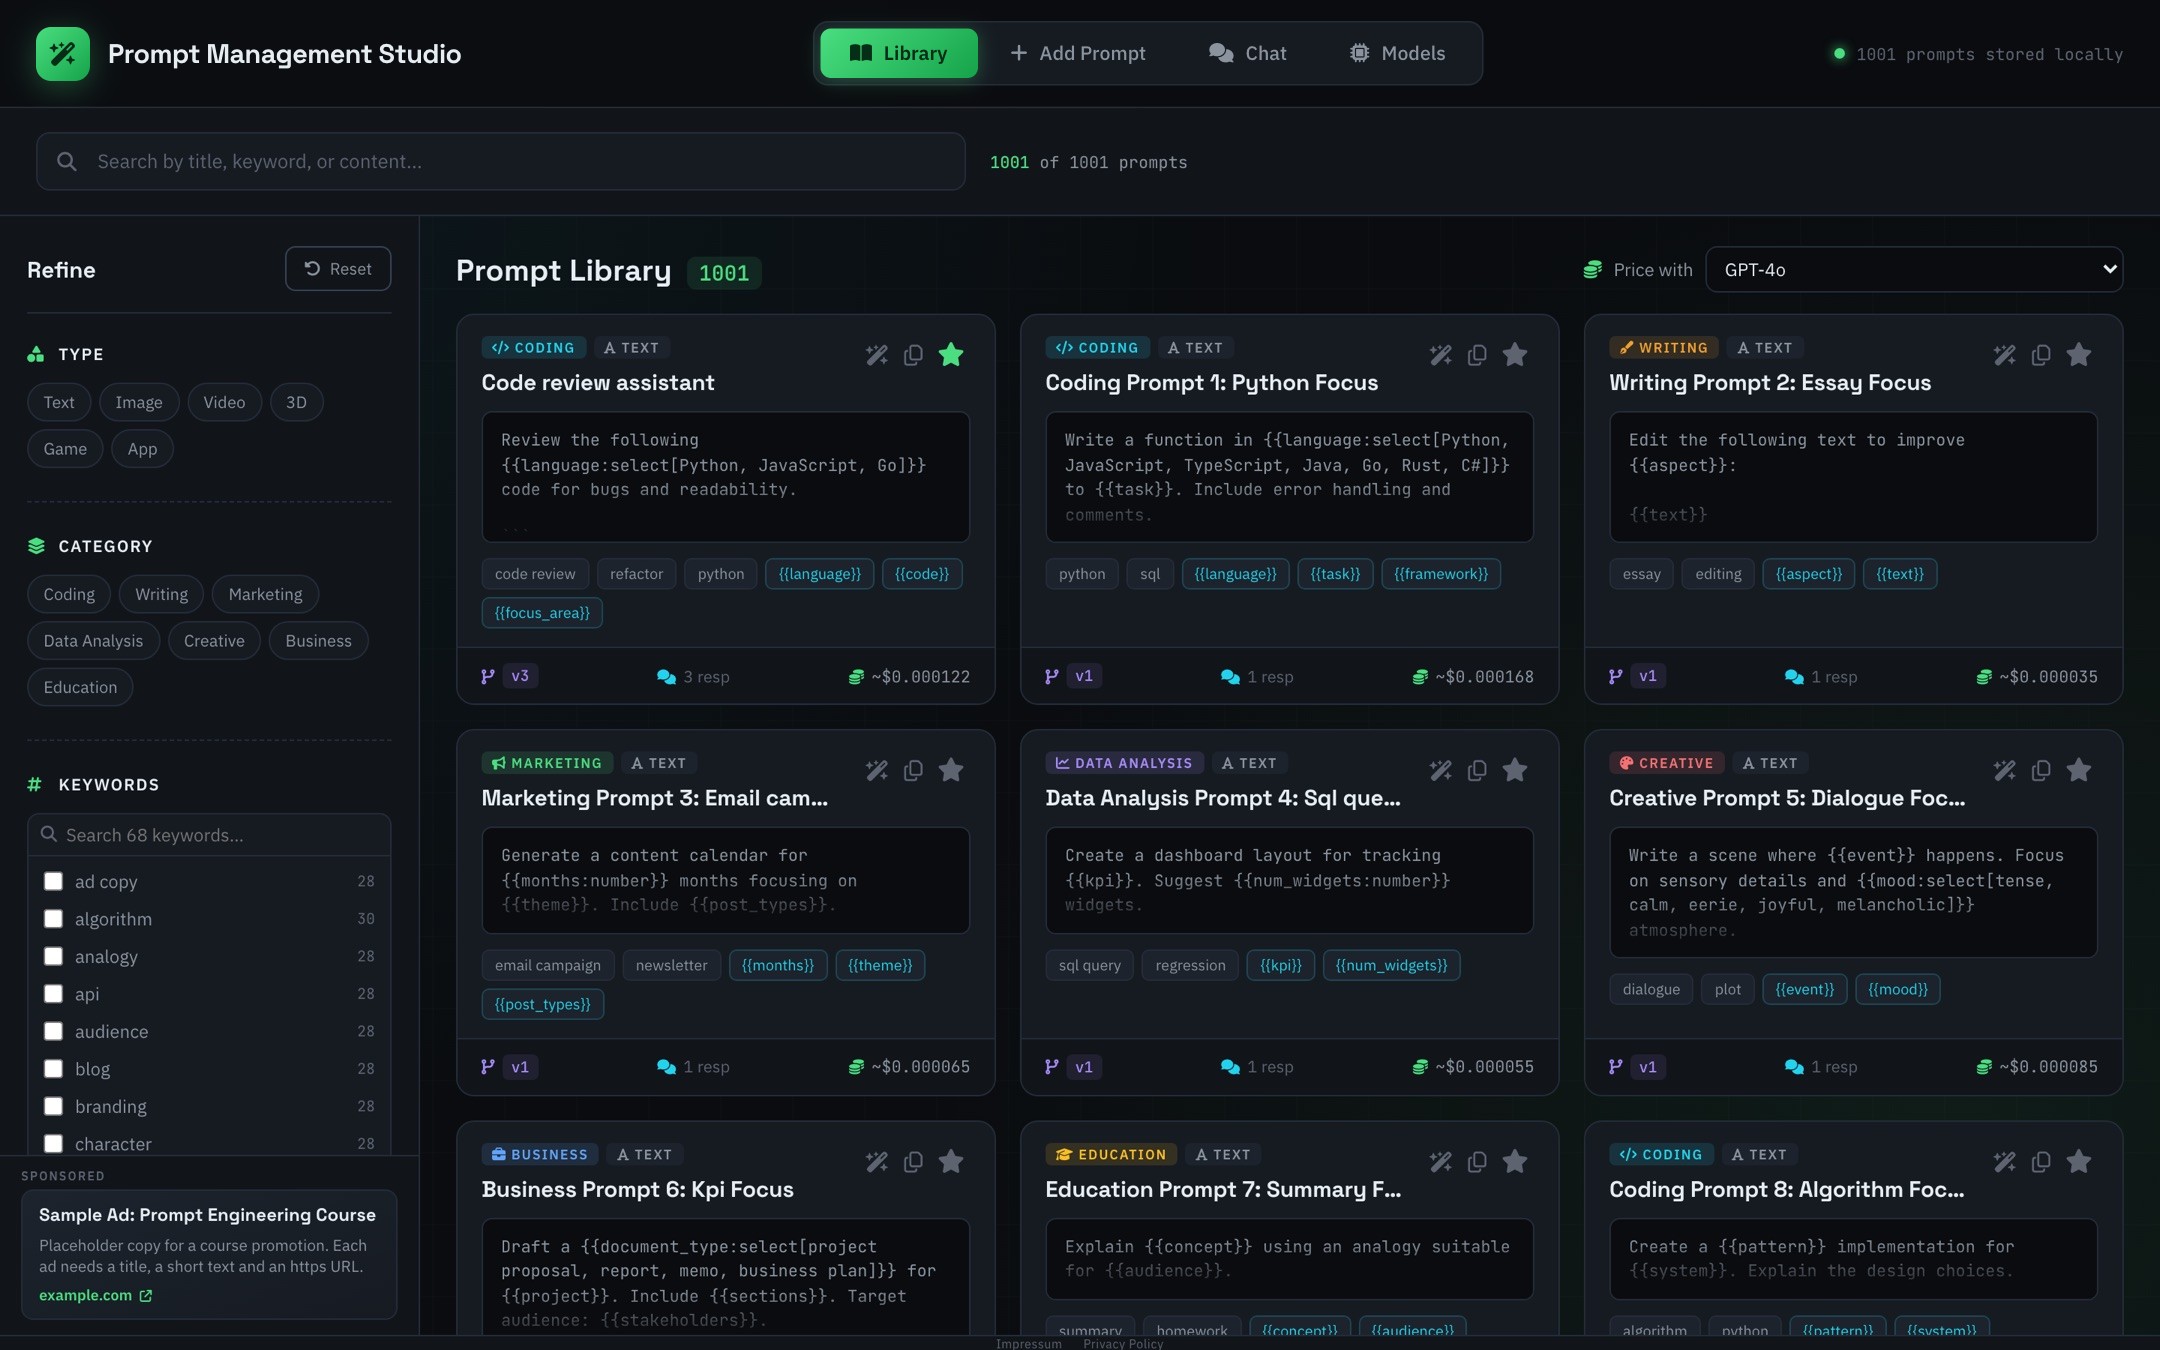
Search by title, keyword or text at the top, and narrow the list with the filters on the left:
- Type and Category: click any pill to filter; click again to clear it.
- Keywords: collected from your prompts automatically, with a count next to each.
- Favorites, Has Responses and User Created: show only prompts that do (or don’t) match.
Reset clears all filters. Each card shows the prompt’s category, type, keywords and {{placeholders}}, plus its latest version, how many responses it has, and its estimated input cost. The icons in a card’s corner Generate, Copy or Favorite it; click anywhere else on the card to open its details.
Price with (top right) picks the model that card costs are estimated with. Any model with a price in the Models tab can be chosen.
Versions and responses
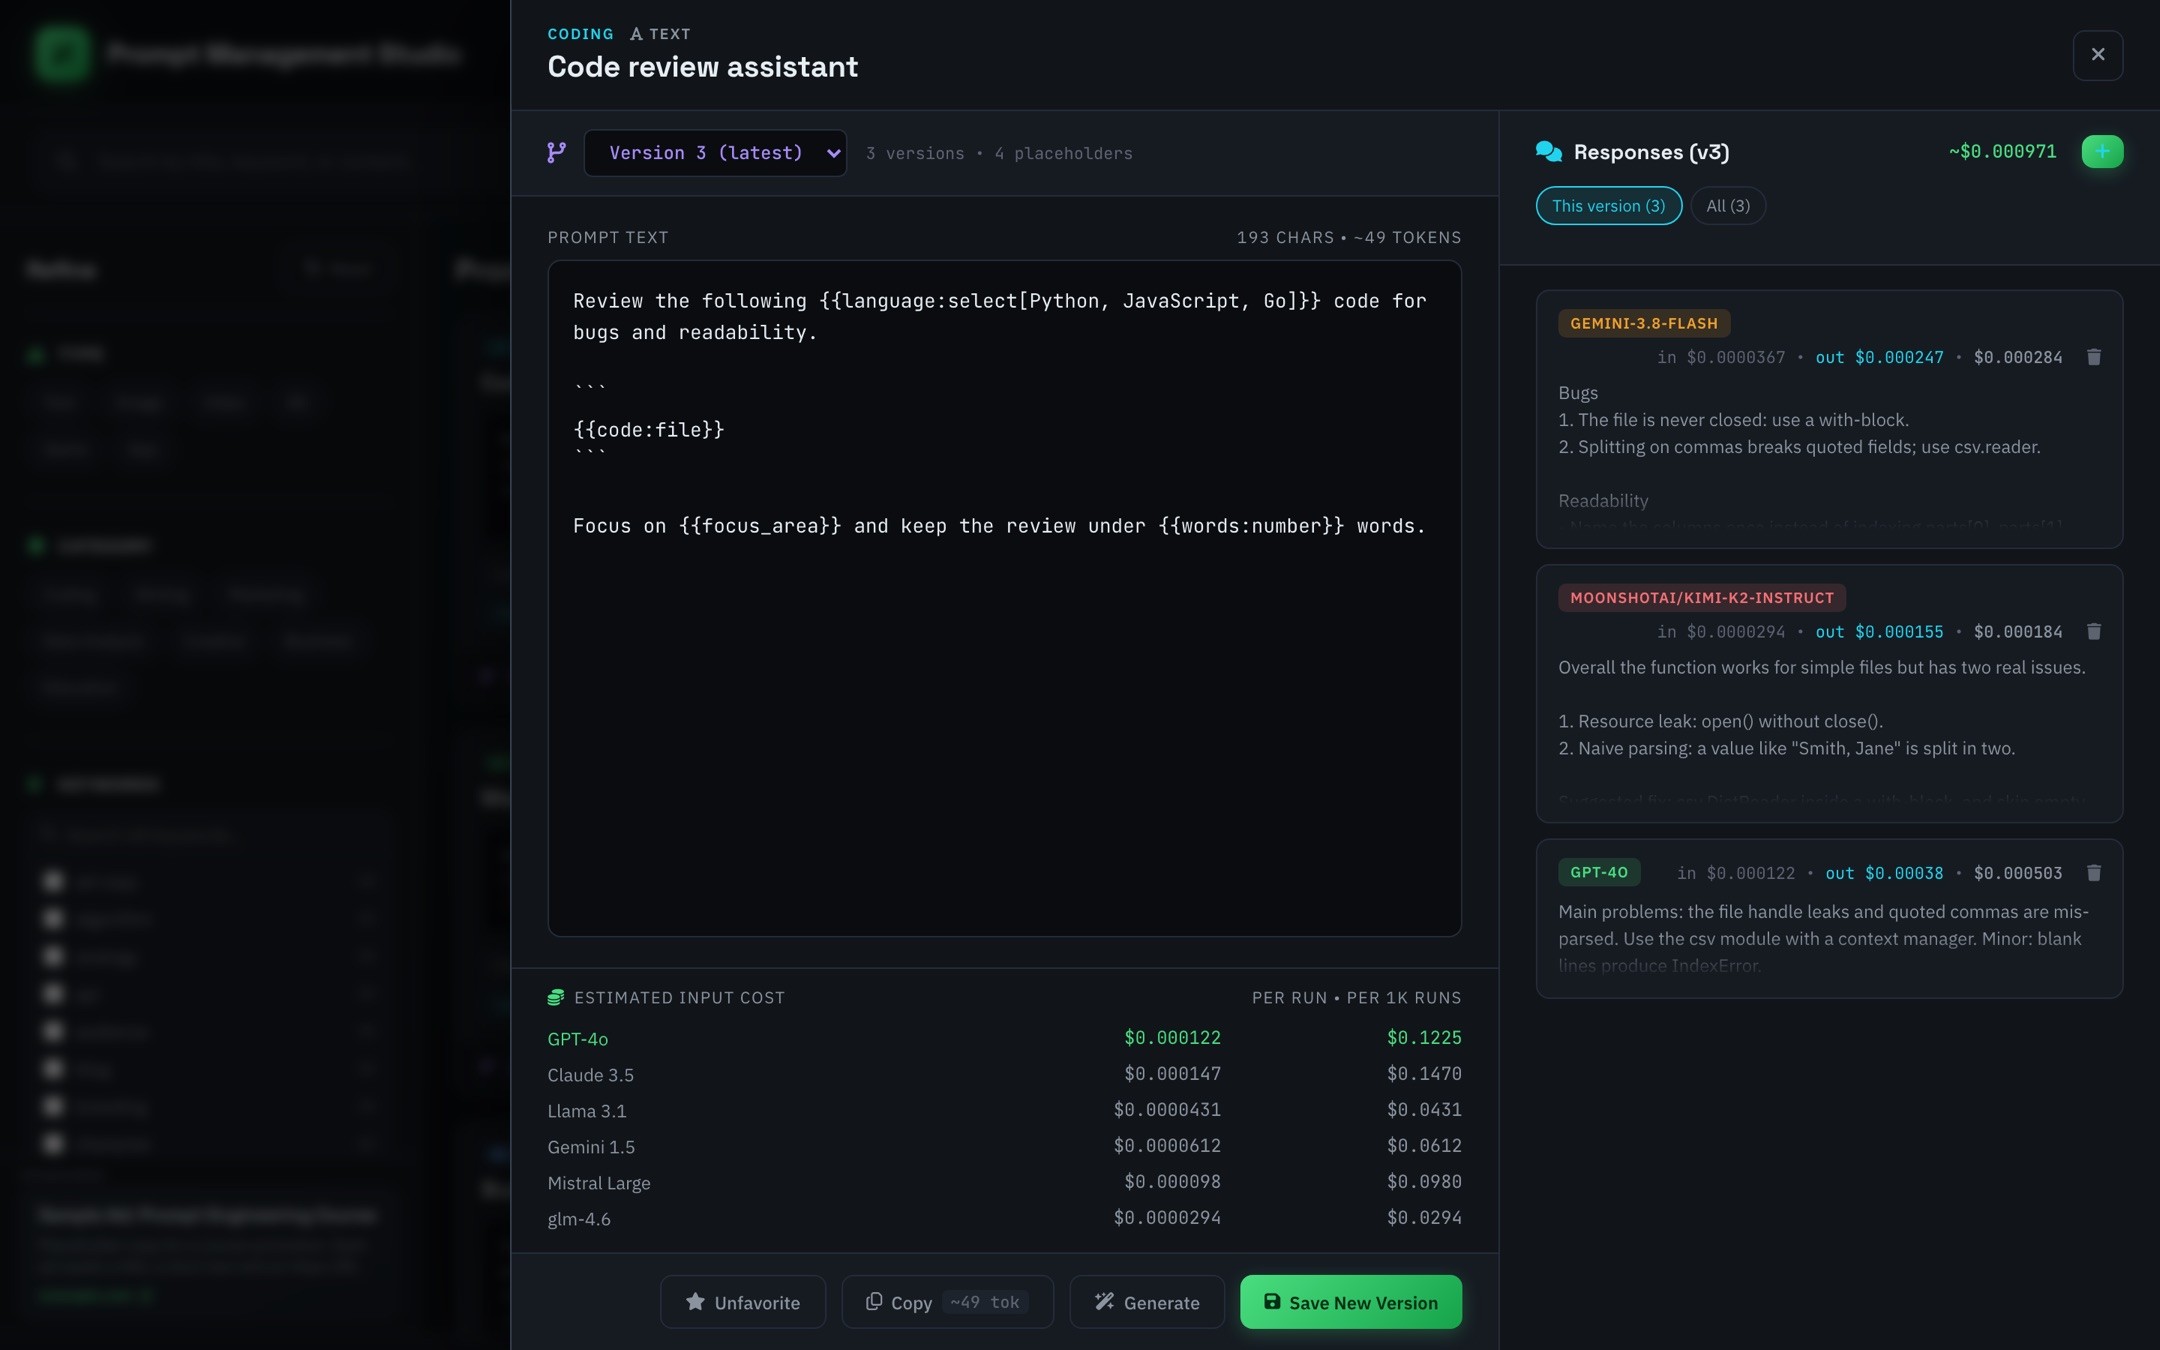
Click a prompt to open its details. Edit the text and click Save New Version; every version is kept, and the version picker switches between them. The cost table under the editor shows what one run (and 1,000 runs) of the text costs on the model you price with and on your Custom models.
On the right are the responses you’ve saved for this prompt, each with its input, output and total cost. This version shows the ones for the version you’re viewing, All shows every version’s. Click a response to read it in full or copy it.
Add a response
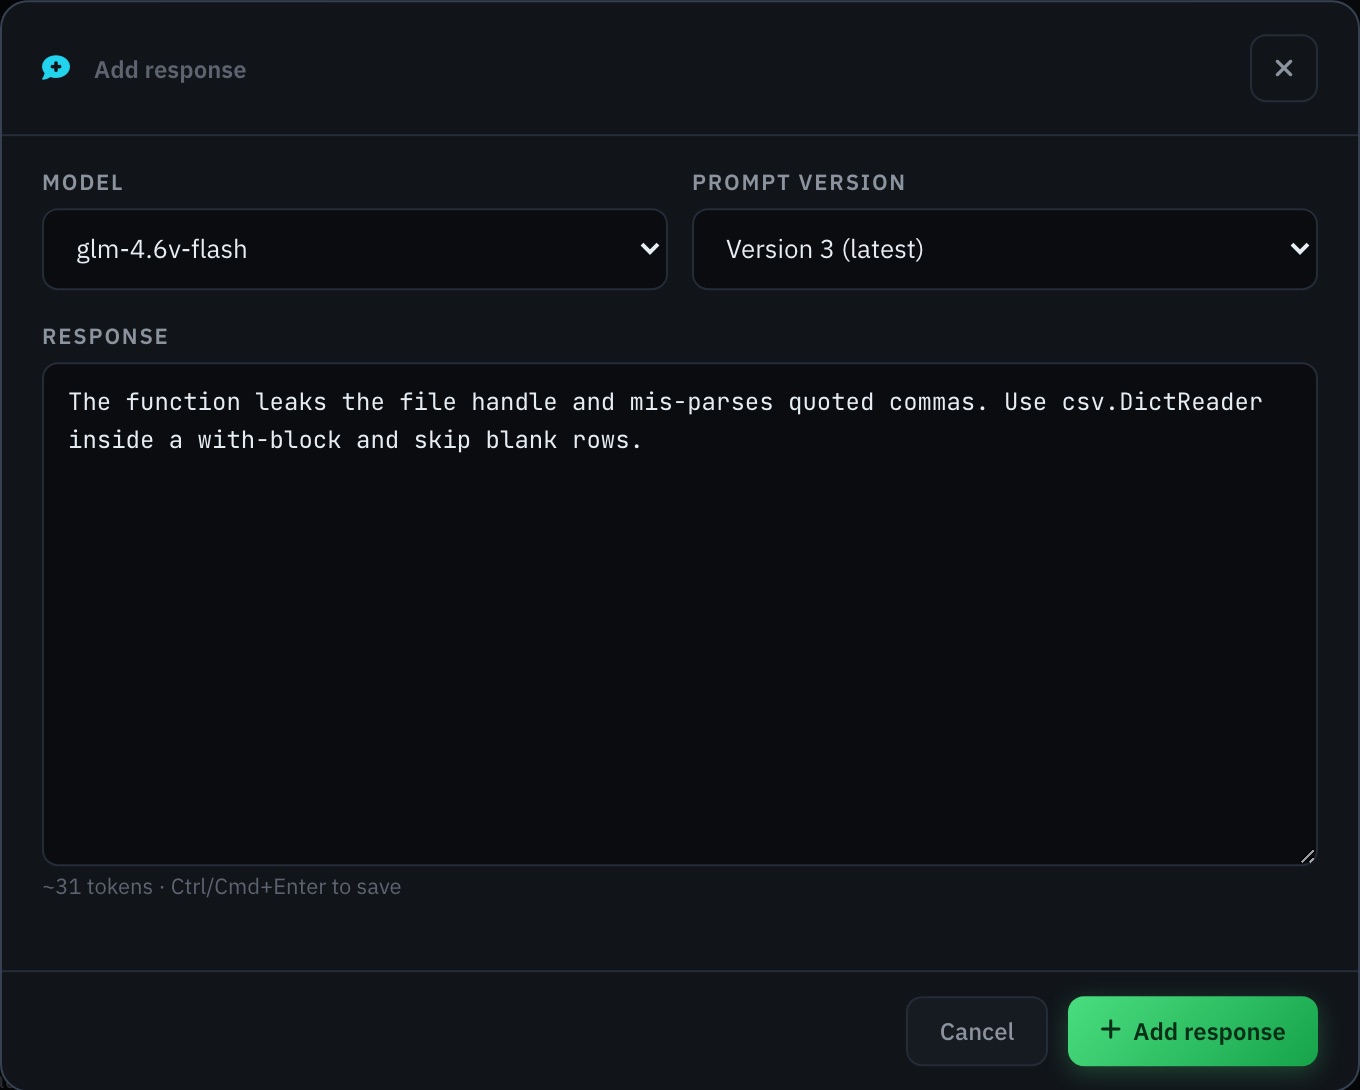
Click + next to the Responses title, paste what the model answered, then pick the Model and the Prompt version it answered. The model list includes your Custom models and every provider’s models, so the response is priced correctly. Press Ctrl/⌘ + Enter or click Add response to save it. The model you picked is preselected next time.
Generate a prompt
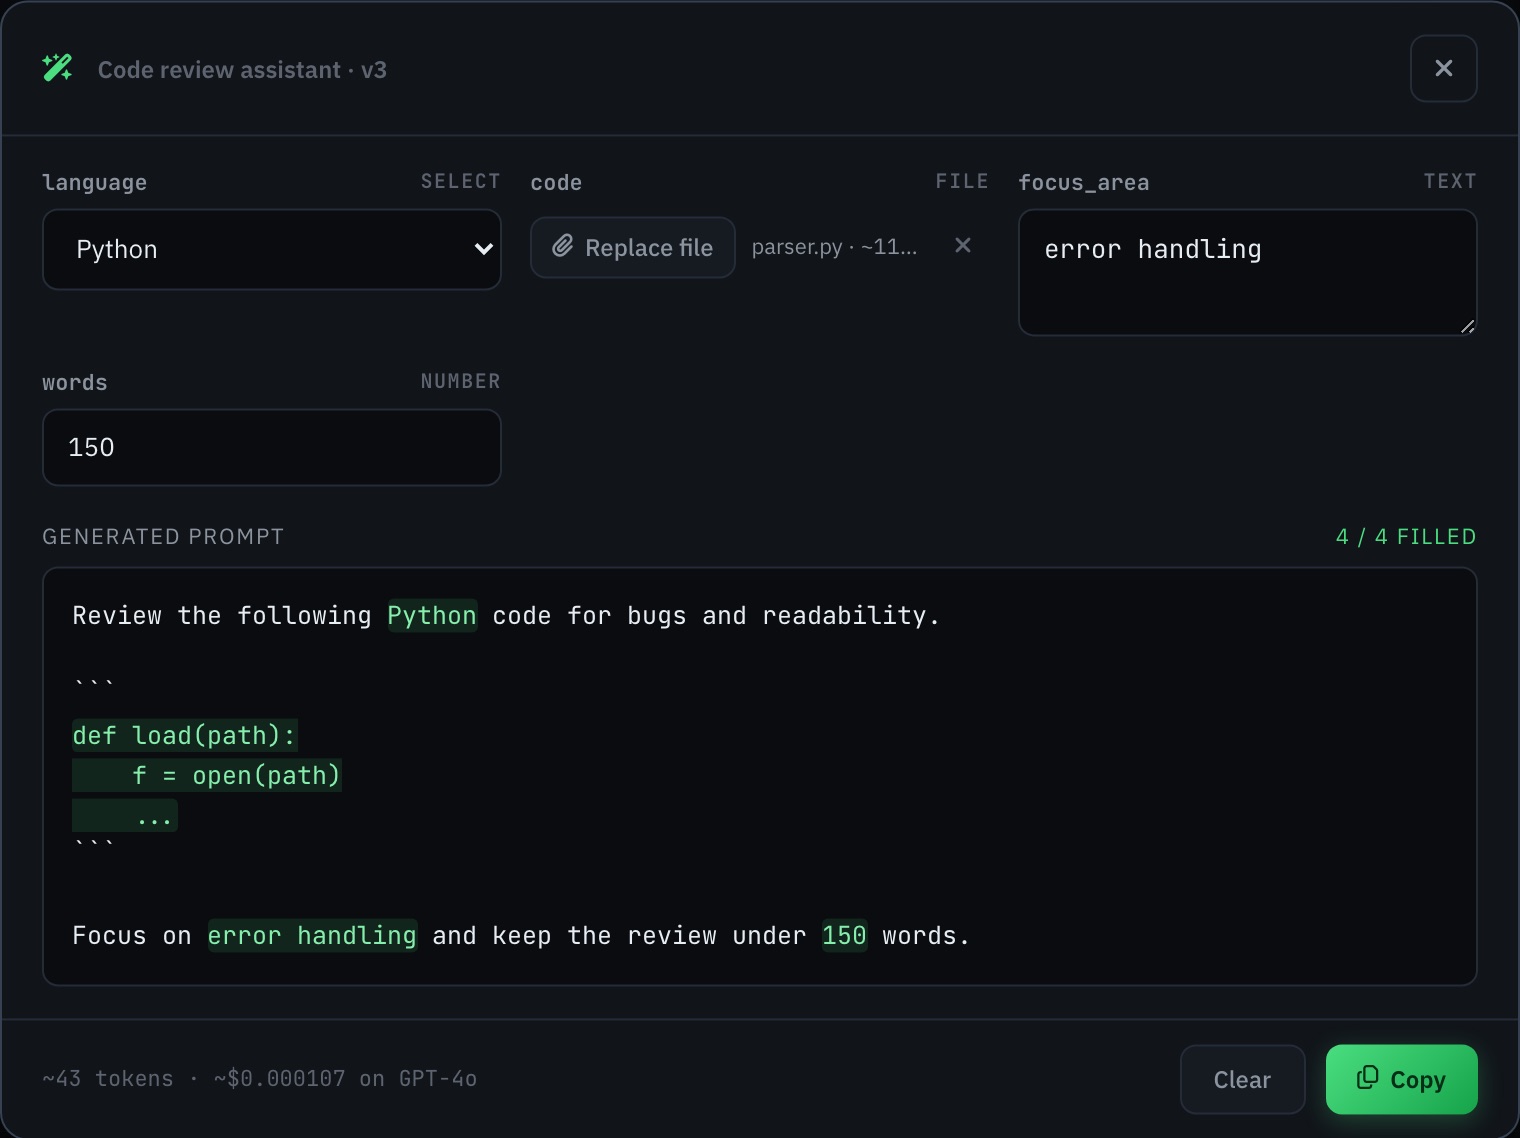
Generate turns a prompt’s placeholders into a form: a dropdown for a select, a number field for a number, a file picker for a file, and a text box for everything else. The finished prompt updates as you type, filled-in parts are highlighted, and the footer shows its token count and cost. Copy puts the result on your clipboard; Clear empties the form.
Placeholders you leave empty stay in the text as {{name}}. The placeholder reference covers every field type with examples.
Add and import prompts
The Add Prompt tab has two ways in:
- New Prompt Template: a title, category, type, keywords (comma separated) and the prompt text. Placeholders are detected when you save.
- Bulk JSON Import: paste an array of prompts. Only
textreally matters; a missing title becomes “Untitled”, a missing category “Coding”, and a missing type “Text”.
[
  {
    "title": "Blog post outline",
    "category": "Writing",
    "type": "Text",
    "keywords": ["blog", "seo"],
    "text": "Outline a blog post about {{topic}} for {{audience}}."
  }
]
You can also save a prompt straight from a chat; see Save a message as a prompt.
Chat
The Chat tab talks to 28 AI providers that offer free tiers. Messages go straight from your browser to the provider you pick, using your own API key.
Add an API key
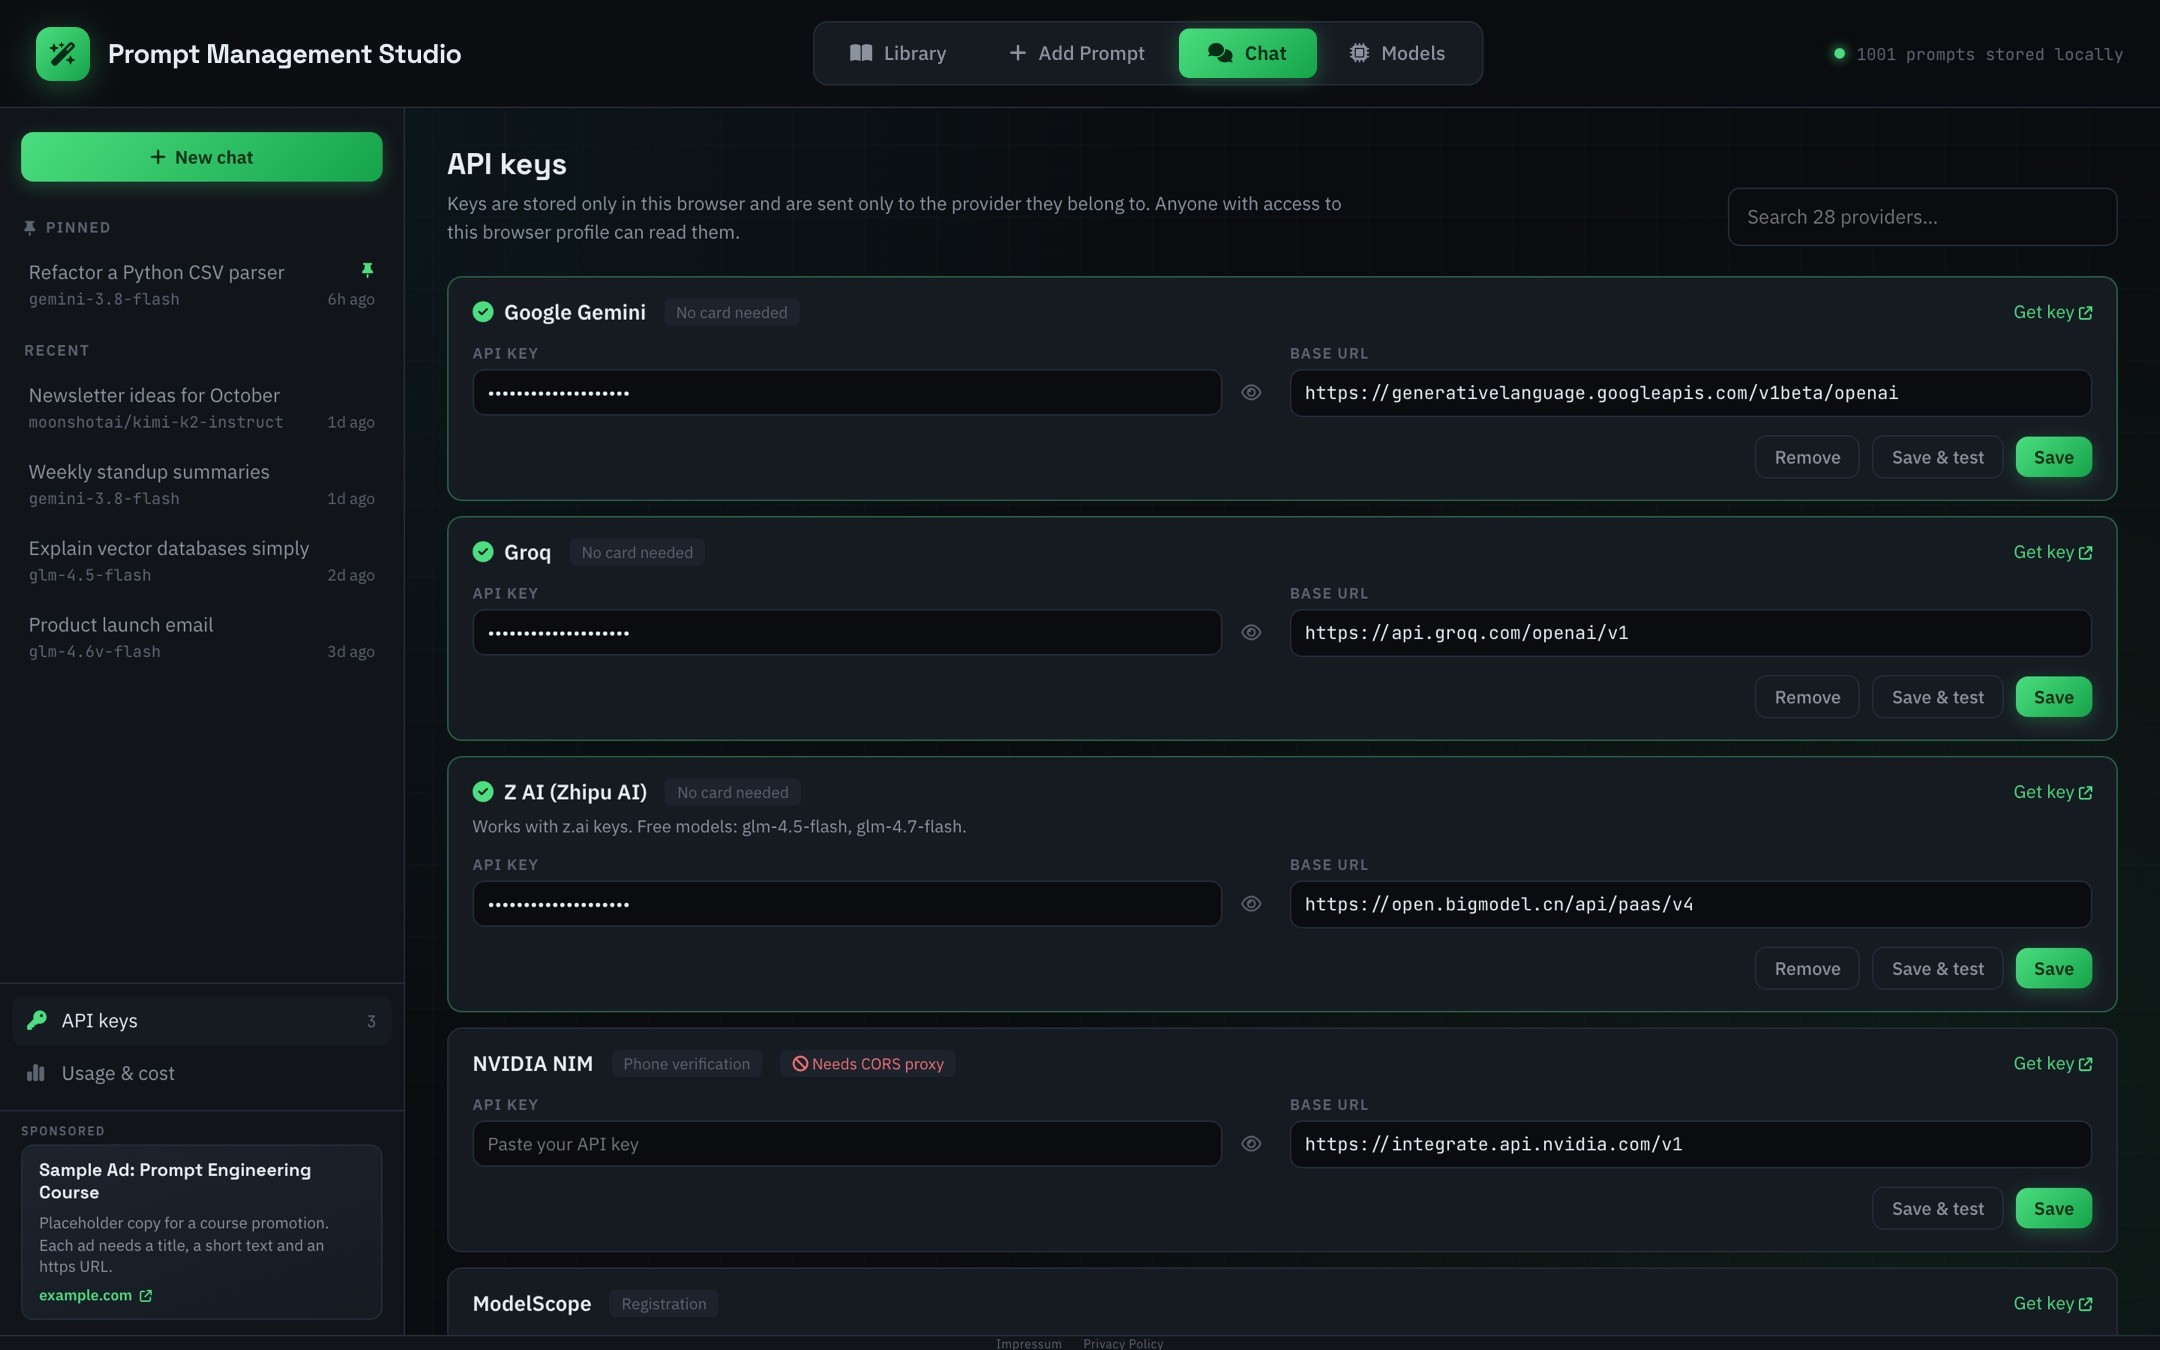
Open API keys at the bottom of the sidebar, find a provider and click Get key to create one on the provider’s site. Paste it and click Save & test: Prompt Management Studio asks the provider for its model list and shows whether the key works. The providers page lists every provider with its sign-up requirements and free models.
A few providers reject requests that come from a browser. They’re marked Needs CORS proxy and only work if you point their Base URL at a CORS proxy you run.
Start a chat
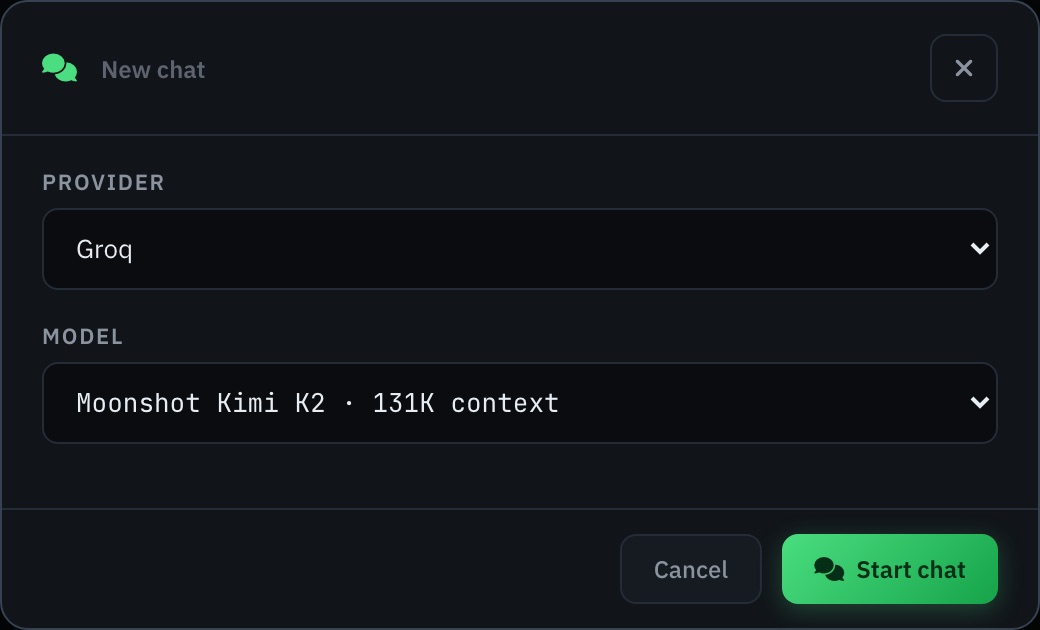
Click New chat, pick a provider and a model, and Start chat. Type your message and press Enter to send, Shift + Enter for a new line. Replies stream in as they’re written; Stop ends one early. If a reply fails, Retry (or Get a reply) sends the last message again.
Replies with Markdown (headings, lists, tables, code) are rendered as such, and each one shows its tokens, cost and time. You can scroll up while a reply is being written; Follow reply jumps back to the end.
Attach files

Click the paperclip, drop files on the message box, or paste an image.
- Text and code files up to 512 KB are added to your message as text, so every model can read them.
- Images (PNG, JPEG, WebP, GIF) up to 5 MB are sent as images. Only models with vision support can read them; others return an error.
PDFs, Word files and other binary formats can’t be attached. Attachments are kept with the message, and since the whole conversation is sent with every reply, they keep counting toward its tokens.
Manage chats
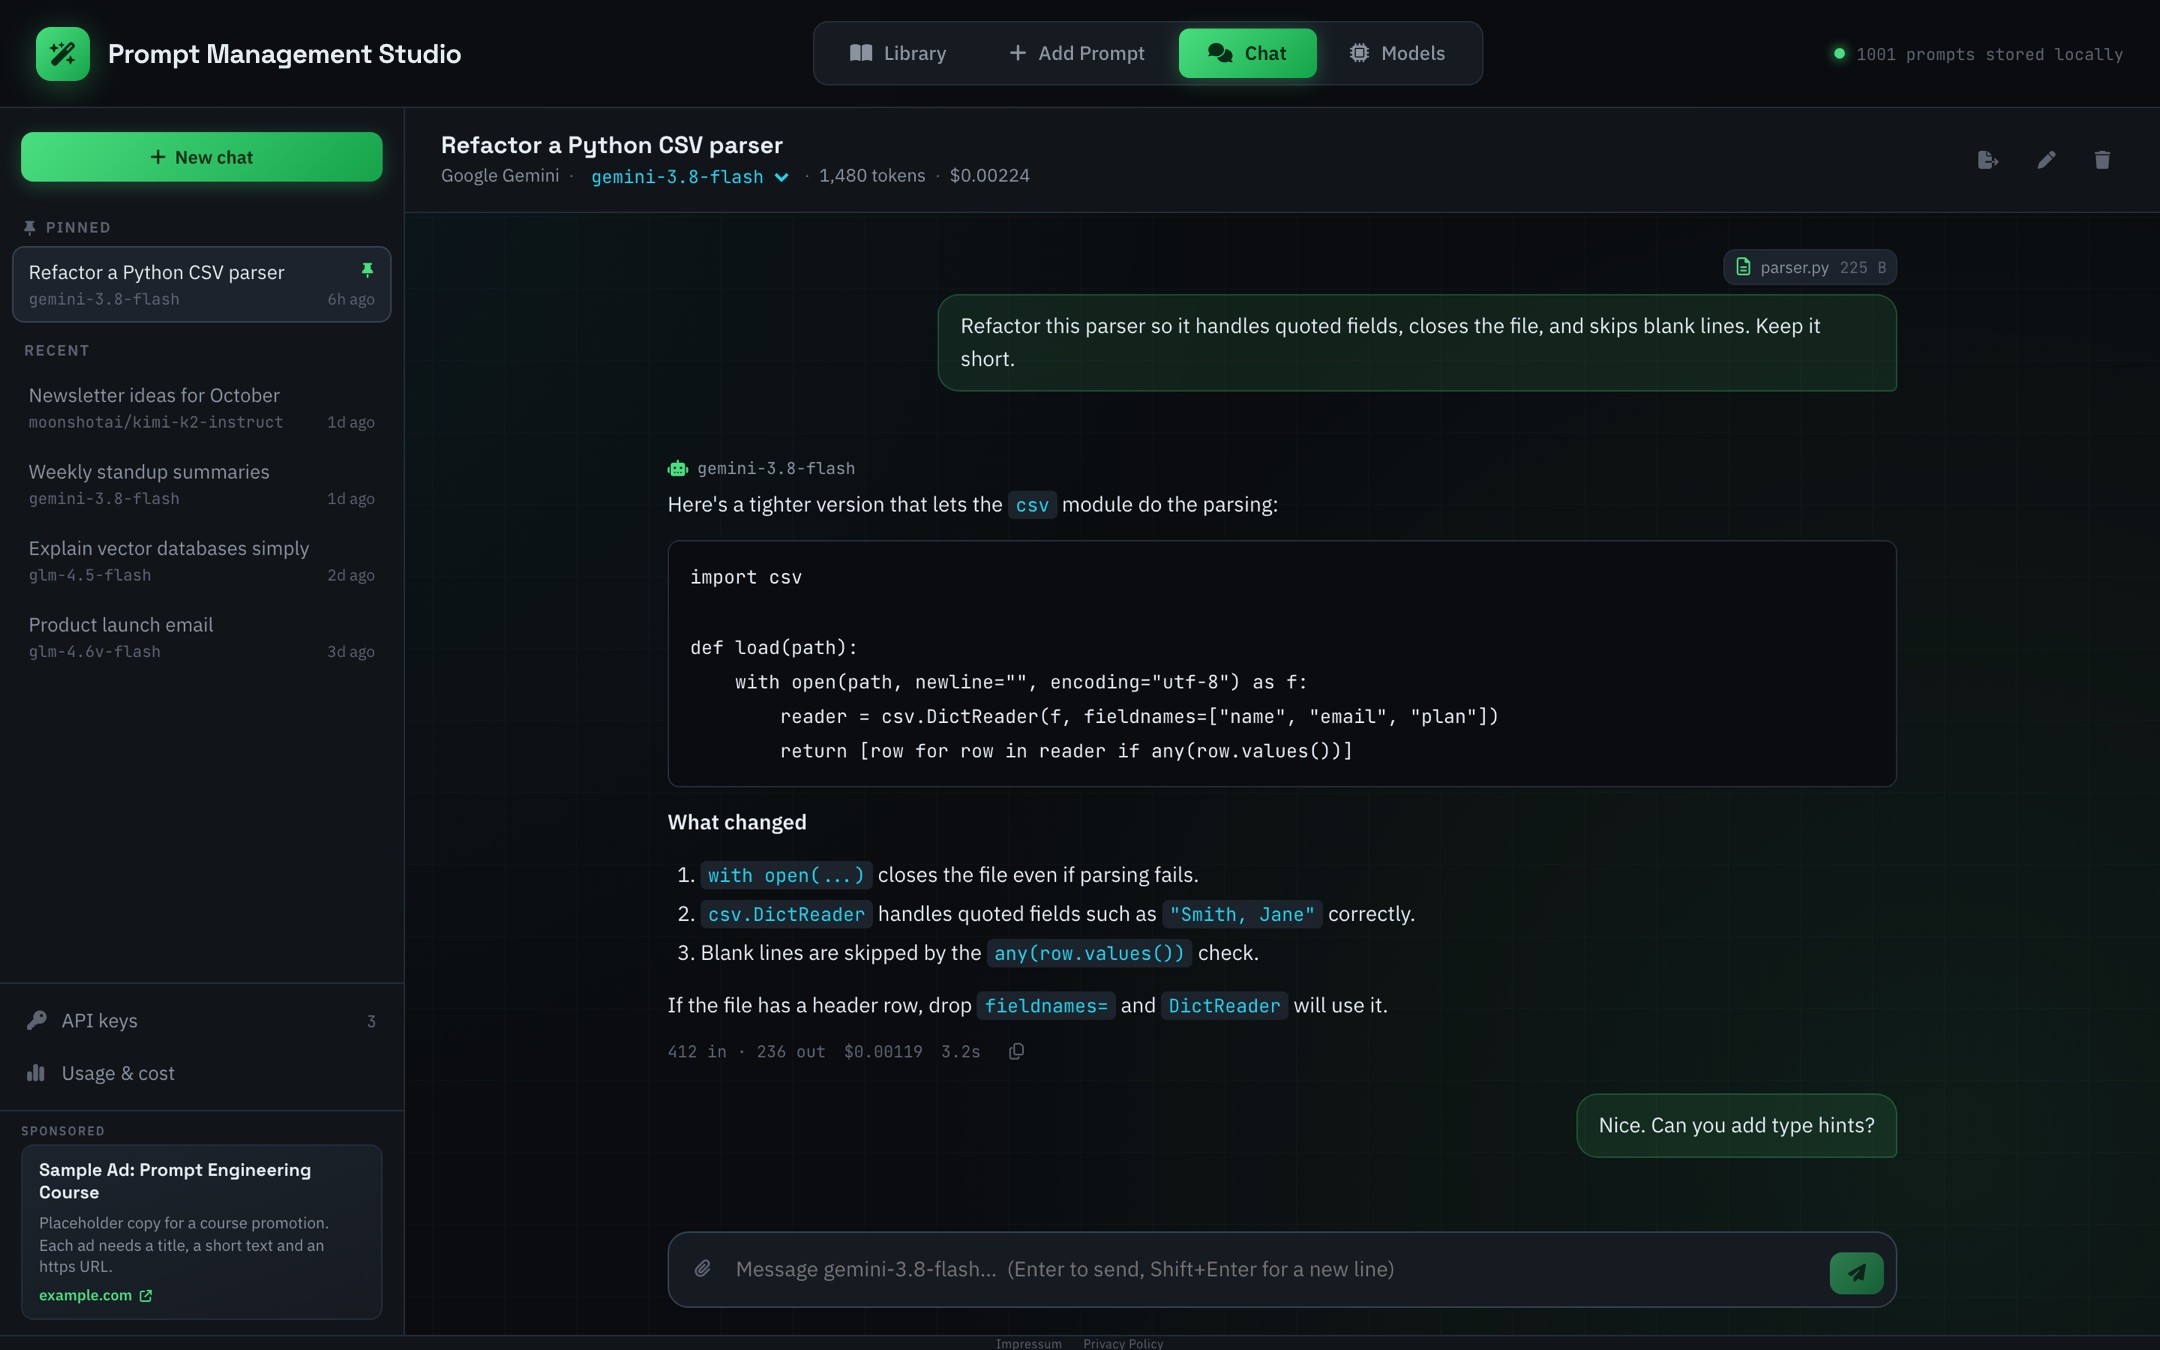
- Switch models: click the model name under the chat title. The next reply uses the new model; earlier replies keep theirs, and their costs stay right.
- Rename: click the title or the pencil, or double-click the chat in the sidebar. Enter saves, Esc cancels.
- Pin: hover a chat in the sidebar and click the pin to keep it at the top.
- Delete: click the trash icon, then Confirm.
Export a chat
Click the export icon in the chat header and pick a format:
| Format | What you get |
|---|---|
| Markdown | A readable transcript with times, attached text files and reasoning |
| A clean, print-friendly copy; choose Save as PDF in the print dialog | |
| CSV | One row per message with tokens, cost and duration, for spreadsheets |
| JSON | Everything, attachments included, as a backup |
Save a message as a prompt
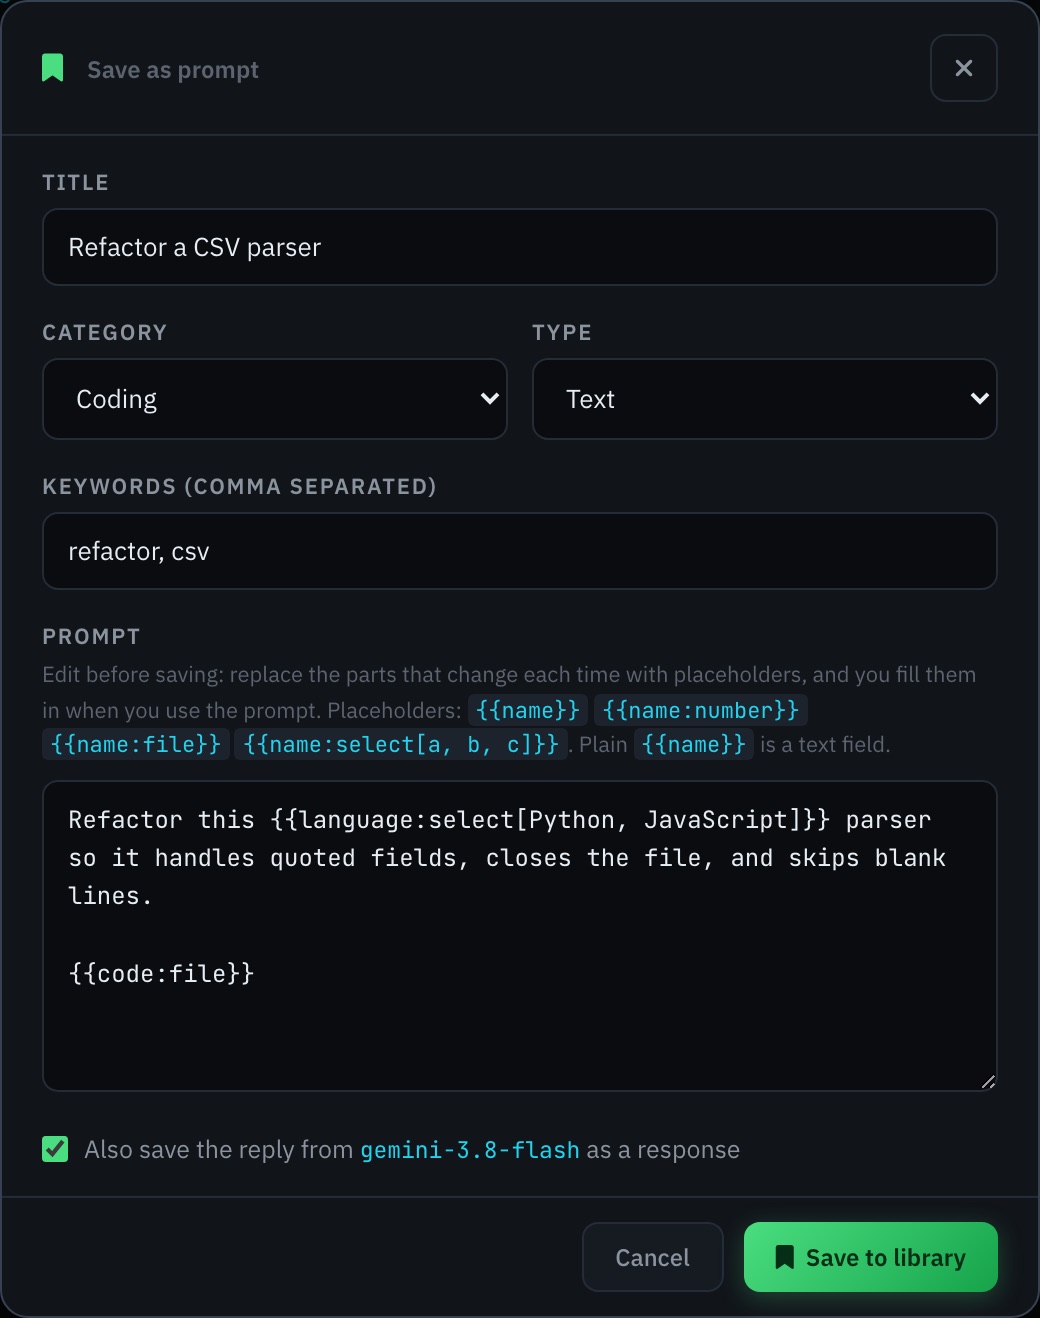
Hover one of your messages and click Save as prompt. Pick a category, type and keywords, then edit the text, ideally turning the parts that change each time into placeholders. Leave Also save the reply checked to keep the model’s answer as the prompt’s first response.
Usage and cost
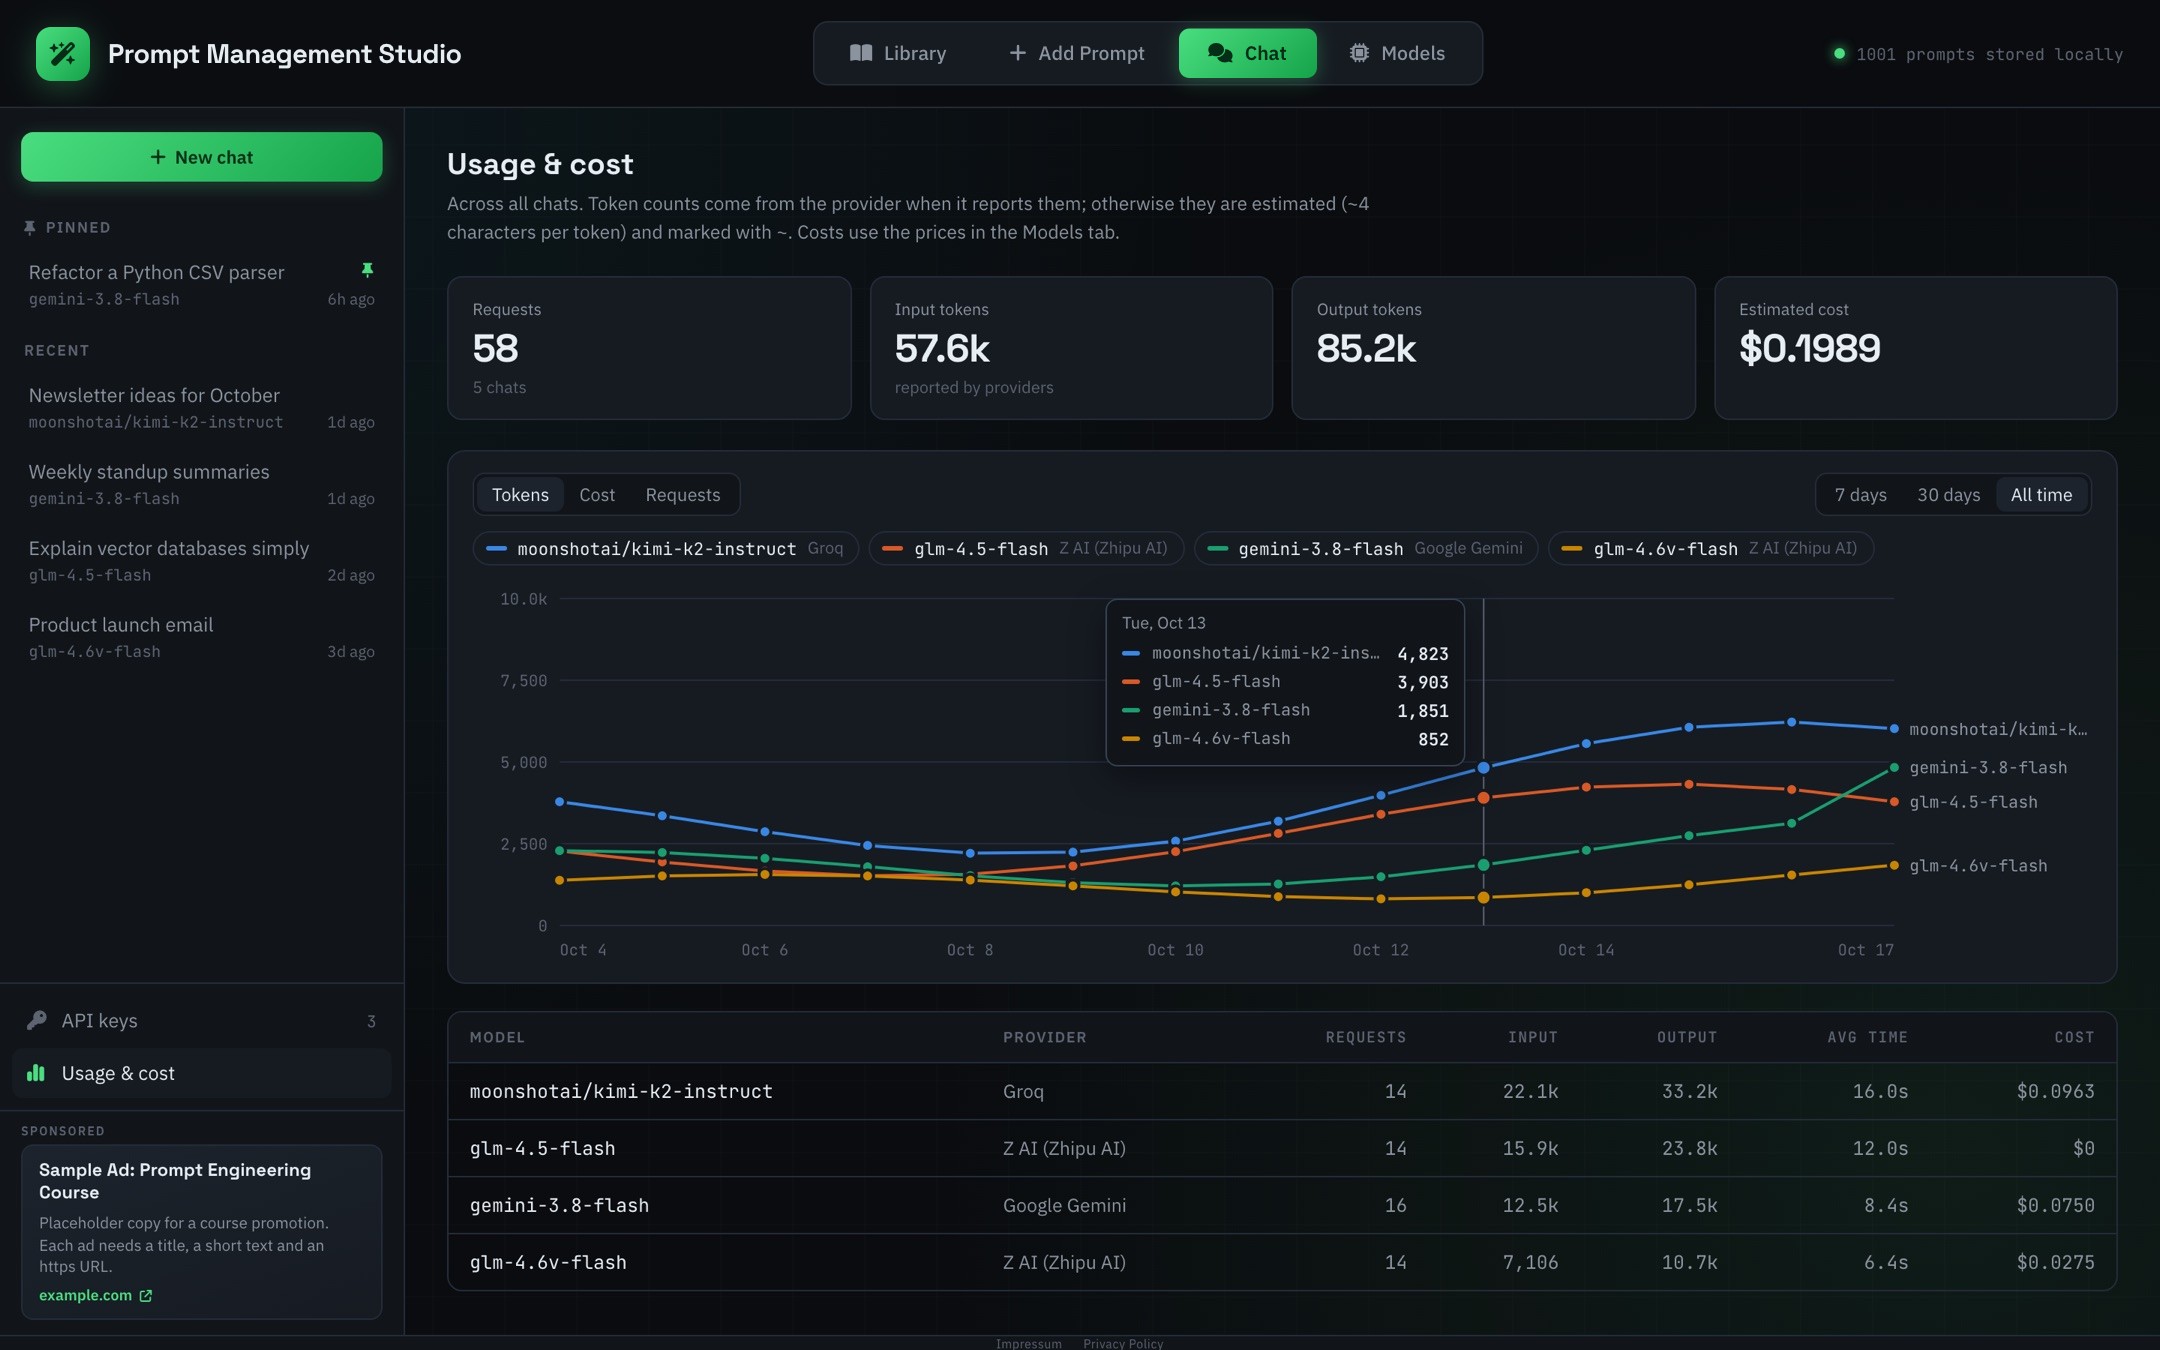
Usage & cost in the chat sidebar adds up every reply across all chats: requests, input and output tokens, and estimated cost. The chart has one line per model:
- Switch between Tokens, Cost and Requests per day.
- 7 days and 30 days show every day of the range; All time shows only the days you used chat.
- Hover a day for exact numbers. Click a model above the chart to hide or show its line.
Token counts come from the provider whenever it reports them; otherwise they’re estimated (about four characters per token) and marked with ~. The table below the chart has each model’s totals, average response time and cost.
Models and pricing
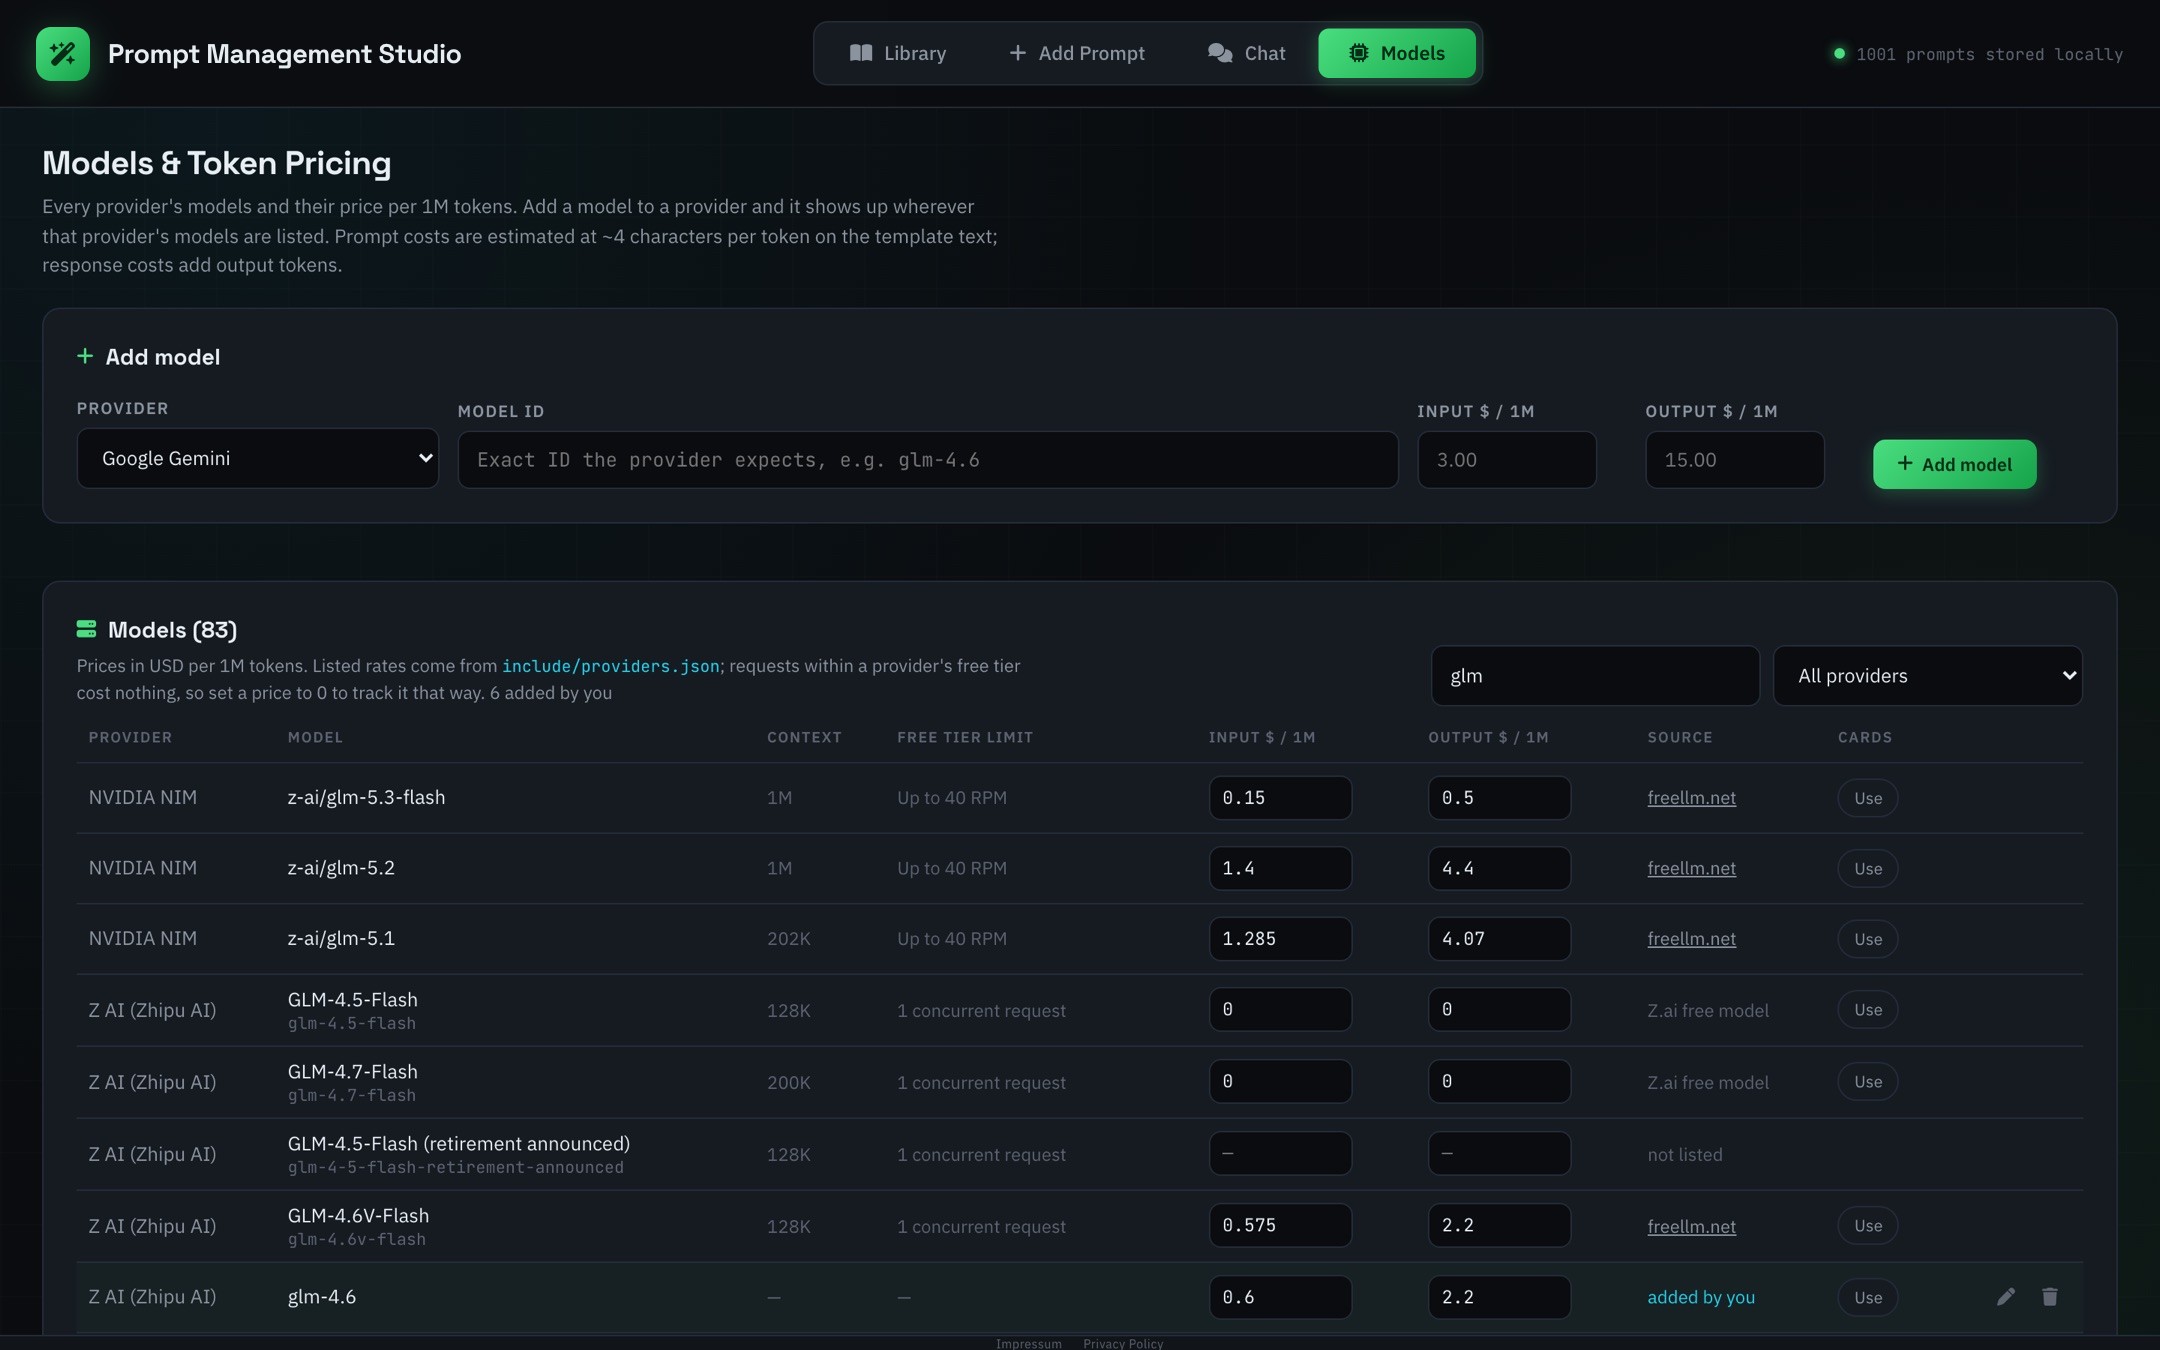
The Models tab lists every provider’s models with their price per million input and output tokens. Listed prices are paid rates; requests within a provider’s free tier cost nothing, so set a price to 0 if you want to track them that way.
- Edit a price right in the table. Edited rows are marked, and the reset icon restores the listed price.
- Add a model: pick a provider, enter the exact model ID and its prices. It then appears wherever that provider’s models are listed, including New chat and the chat model switcher. Pick Custom for a model you only want to price, without a provider to chat with.
- Use sets the model the library’s cards are priced with.
Your data
Prompts, chats, API keys and prices are stored in your browser’s IndexedDB, on your device. Prompt Management Studio has no server of its own. Only chat messages leave your browser, sent directly to the provider you chat with, along with that provider’s API key.
That also means your data lives in one browser profile: it doesn’t sync across devices, and clearing your browser’s site data deletes it. Export chats you want to keep as JSON. Anyone with access to your browser profile can read your API keys, so don’t store keys you want to keep private on a shared computer.
Troubleshooting
“The request did not reach the provider.” The browser couldn’t reach the provider at all. In order of likelihood:
- The provider rejects browser requests (CORS). Check for a Needs CORS proxy badge under API keys.
- A browser extension (an ad blocker or a company security tool) blocks AI APIs. Try a private window with extensions off.
- The Base URL is wrong, or still contains a placeholder like
{account_id}. - You’re offline.
401 · API key rejected. The key is wrong, expired, or for a different provider. Paste it again and use Save & test.
429 · Rate limit reached. You’ve hit the provider’s free-tier limit. Wait a moment, or switch to another model or provider.
400 · Bad request. Often a model ID the provider doesn’t recognize, or an image sent to a model without vision support.